Artwork quality and document set up play a really big part in our ability to accurately produce your printing products. While we will briefly touch on other elements of colour space and quality, this entry will specifically focus on document setup and specifically bleed.
We are extremely understanding that in order to get exactly what you want, as well as to save yourselves the cost of design you want to delve in to the realms of graphic design and desktop publishing. We commend you on your efforts. While this is not an easy thing, suitable software is available (many of which are free) and there is unlimited knowledge available on the internet. However, it can be quite awkward for us when we have to come back to you and tell you that your “print ready artwork” is not able to be printed in the way you envision.

Often we receive artwork designed in Microsoft Word or Publisher – because these are what most people have access to. However even worse, we have regularly enough received artwork produced in PowerPoint.
For those of you with the better fortune to have access to the Adobe Suite (Primarily Photoshop, Illustrator and Indesign) we are more than happy to provide you with specific print templates for your project or give you the advice and assistance to set up your documents correctly yourself. Sadly, these are generally a moderate expense to have.
When designing for print, we require a minimum of 300dpi quality for bitmap images and artwork or vector artwork. All artwork must be converted to a CMYK colour space and it is also highly recommended that all fonts be converted to outlines.
In a separate post we will go in to details as to which program to pick for what purposes. There will also be a post to follow on vector vs bitmap artwork. We also intend to give you the information you need related to choosing the correct colour space for on screen viewing and for print production.
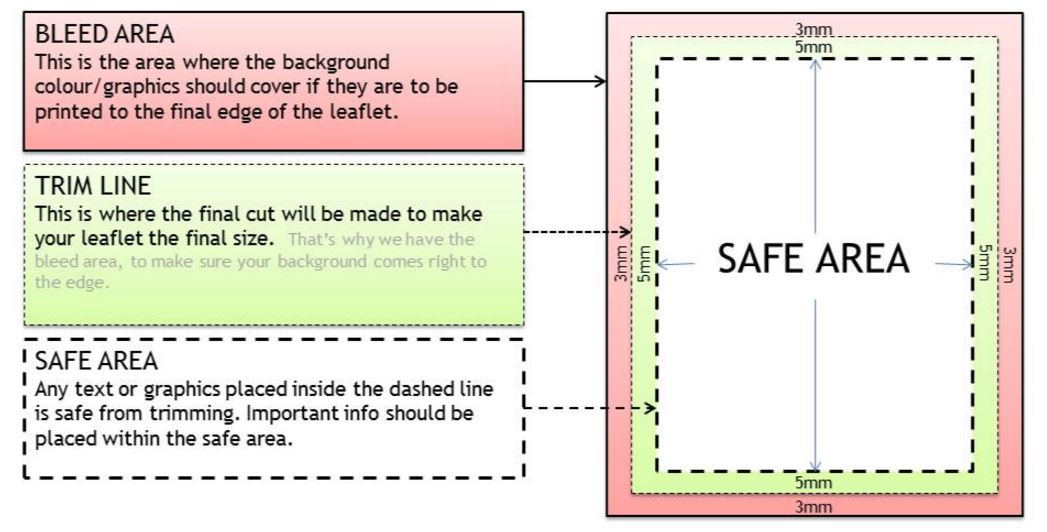
| SO WHAT IS BLEED? Simply put, bleed is the extra artwork designed and printed outside the intended final size of your product. The sole purpose of bleed is to prevent white gaps being left around the edge during the trimming process. |
Have you ever tried cutting a shape out and following exactly around the outline printed? Did you find you ended up with bits of the outline being left and bits of the outline being cut off? Try imagining us cutting a stack of several hundred images at the same time. There can be a fraction of a millimeter difference between each sheet, or between the front and back of a double sided page.
One of the ways we like to describe bleed is to liken it to painting. If you have ever used tape or a stencil to mask off around a wall or on other painting projects, you don’t try to perfectly follow the edge of your mask, stencil or tape. You intentionally paint over and on top of this masking, else your edges are not clean, sharp and complete. Then at the end you remove the masking and you end up with a perfect edge. In printing we like to print that extra area, and then when we cut, it is removed.

So how much bleed should you include?
Well that again can greatly vary depending on the print production team and method as well as the product that is being produced. The simple answer is just ask before designing any given project. However if you want to get the art moving beforehand and need some basic guide lines, more is always better than less.
When it comes to digital and offset print production, the best recommendation we can give is design with 5mm bleed per side. This will generally COVER ALL BASES. For a time on most projects we were working with 2.5mm per side, as that made 5mm over the total width of a page, many production teams requested 3mm which does not make a nice easy to work with number. 5mm is a pretty safe number in that it averages as a total 10mm each direction on a page as well as it has better allowances on large saddle stitched books where there is a bit shift and more complex creep adjustments required due to the binding method used.
For most sign products we generally recommend the inclusion of 10-15mm of bleed PER SIDE. However, some signs go on not perfectly square shapes, such as one way vision on a vehicle rear window. On these we like to include 20-50mm per side depending on the restrictions of the media being used.
Be extremely careful if you decide to go without bleed, as trying to get the “white borders” perfectly even around the outside can be next to impossible. We recommend you go without bleed only if you intend to have a white background (the colour of the paper).
Bleed is not supported officially in programs like Word and Publisher. You can fake it by designing firstly at the final size, then resizing your margins and artboards to suit, but this is very fiddly to get just right.
Illustrator and InDesign ask you to import your bleed settings when creating a new document. However, in Photoshop bleed is not a supported function of the program, but bleed can be created. The easiest way to do this is to create an artboard at your desired size, say A4. 210mm x 297mm at 300 pixel/inch in CMYK. Turn your rulers on if they are off, then drag a ruler (thin cyan coloured line) to all 4 edges of the artboard. Then go image>Canvas Size and increase the size by 10mm (either to 220×307 or by 10mm in both width and height using the relative function. This can also be used to create a “safezone” in photoshop by starting with a 200x287mm artboard, adding rulers and then following on from above. A similar method can be used in Illustrator to create a “safezone” by starting with a smaller artboard and resizing it.
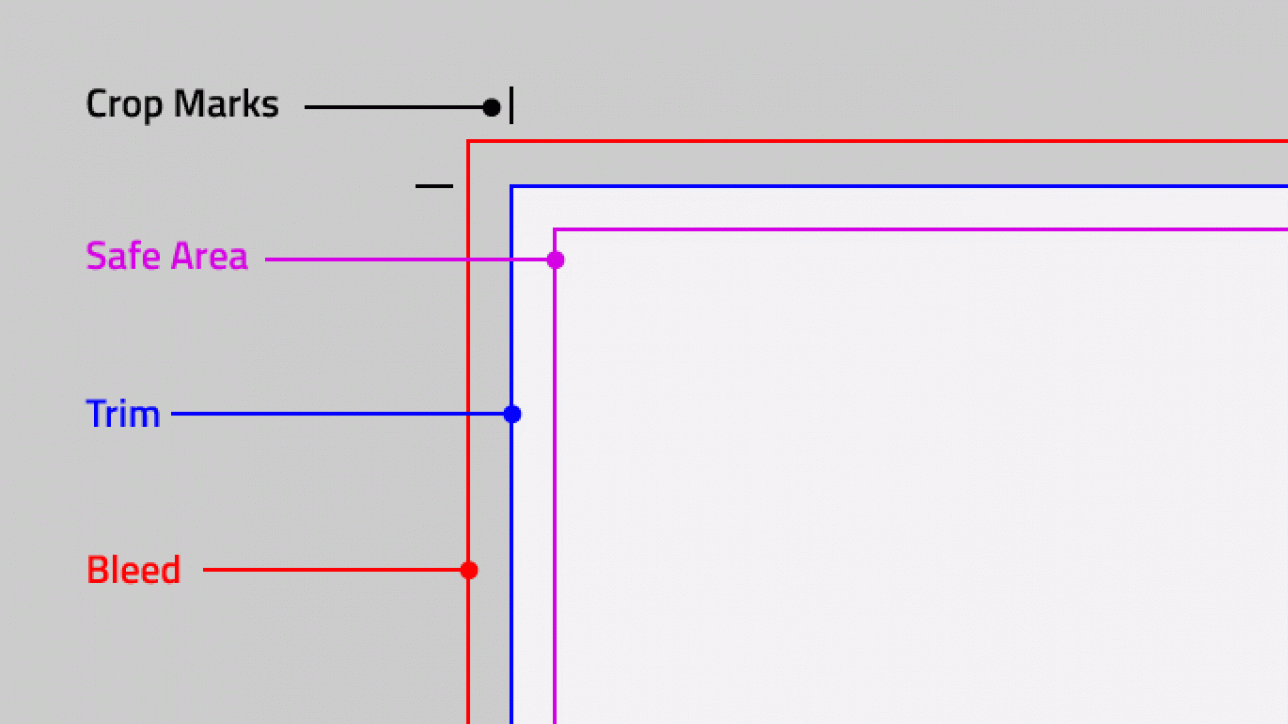
What bleed looks like in different programs: – These examples are all of Landscape A4 pages with 5mm bleed – Either with or without Safe Areas.
As a final point, there is also the reverse of bleed, what is generally referred to as the safe area. This is how far from the edge of the final page important artwork (generally logos and text) is placed. Not only does this prevent important information from being cropped off, it creates a nice spacing and border within your artwork to make it look tidy. On smaller items such as business cards 3-5mm is sufficient, however on large documents you want around 10-20mm minimum. If you are unsure we are happy to advise what we think would work best for the size of your artwork. In most cases the safe area should be the same as or double the size of the bleed allowed for the particular job.


